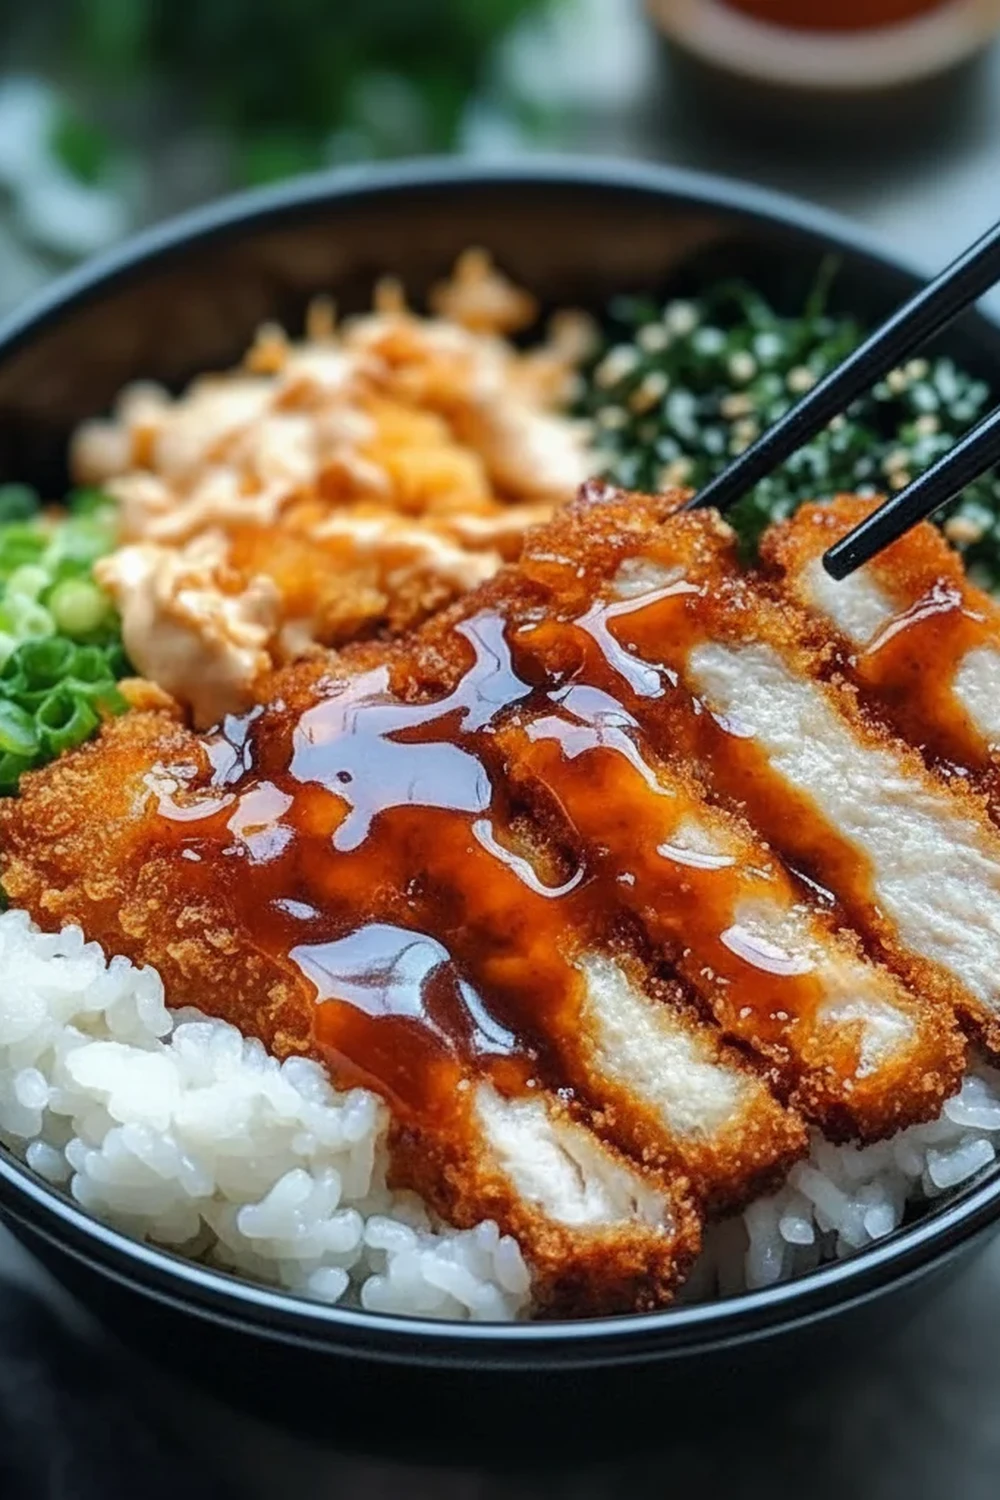
Japanese Katsu Bowls Recipe
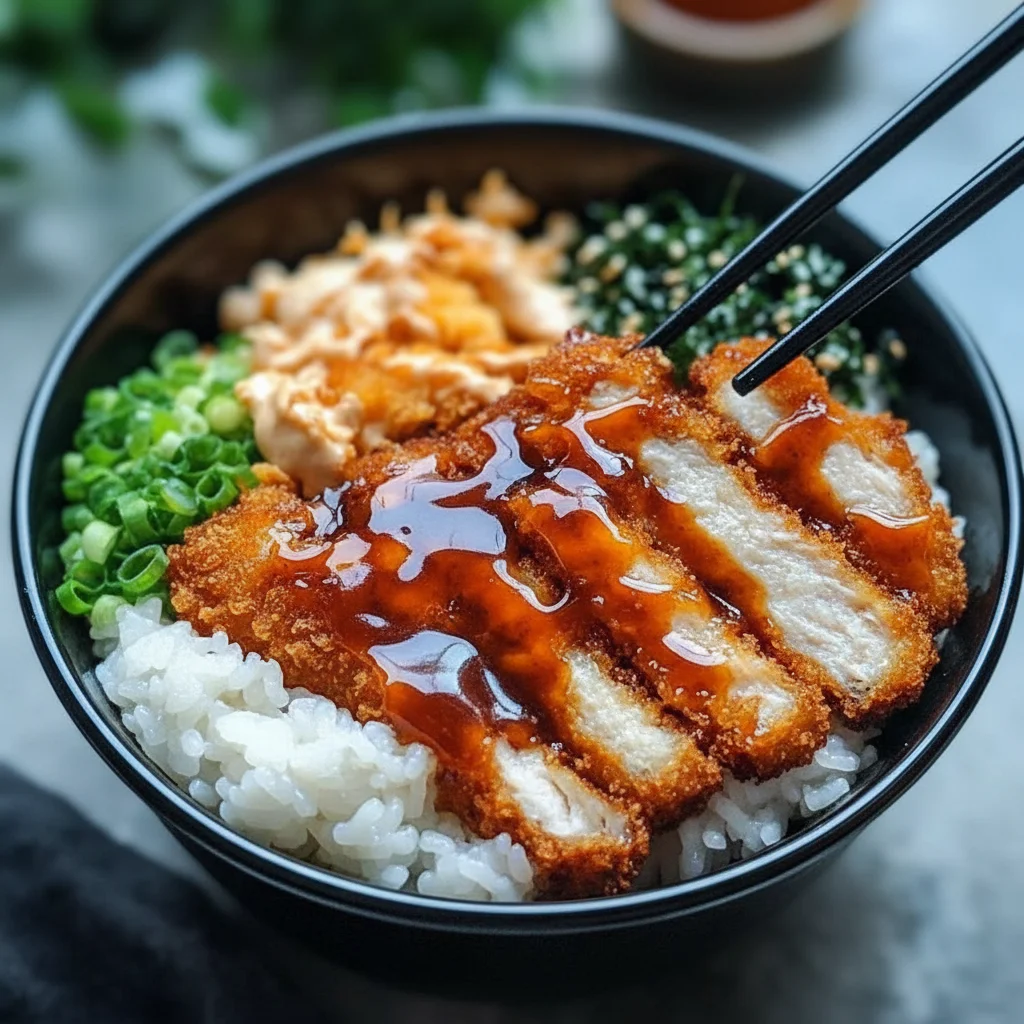
There are some meals that just hit the spot every single time, and for my family, this is one of them. The sound of a perfectly fried chicken cutlet, its panko crust shattering under the knife, is one of the most satisfying sounds in my kitchen. Layered over a bed of fluffy Japanese rice with a tangle of crisp cabbage and a generous drizzle of rich, tangy tonkatsu sauce, these Japanese Katsu Bowls are a symphony of texture and flavour.
I’ve been making this for over 6 years, and it never disappoints. It started as an attempt to recreate a fantastic meal we had at a small Japanese restaurant and has since become a staple in our home. What I love most is that while it feels like a special treat, it’s built on straightforward techniques that any home cook can master. We’ll walk through every step together, from getting that chicken perfectly thin to mixing a homemade tonkatsu sauce that rivals any shop-bought version.
This recipe is more than just a set of instructions; it’s a guide to creating a truly memorable meal. We’ll cover the little details that make all the difference – the right oil temperature for that golden-brown finish, the importance of resting the chicken for ultimate juiciness, and how to assemble the bowls for that picture-perfect presentation. Get ready to bring a taste of Japan into your kitchen.
Recipe Overview
- Prep time: 20 minutes
- Cook time: 25 minutes
- Total time: 45 minutes
- Servings: 4 bowls
- Difficulty: Medium
Why You’ll Love This Japanese Katsu Bowls Recipe
- Incredibly Satisfying Crunch: This method guarantees a light, airy, and audibly crispy panko crust that stays crunchy even after you add the sauce.
- Rich Homemade Tonkatsu Sauce: The homemade sauce is the heart of this dish. It’s a deeply savoury, sweet, and tangy condiment that you can whip up in minutes with a few pantry staples.
- A Complete, Balanced Meal: With protein from the chicken, carbohydrates from the rice, and freshness from the cabbage, it’s a well-rounded and substantial meal all in one bowl.
- Authentic Flavours, Accessible Method: It captures the genuine taste of a Japanese eatery but is broken down into clear, manageable steps for the home kitchen.
- Versatile and Adaptable: You can easily swap the chicken for pork (to make Tonkatsu) or even firm tofu. The bowl toppings can be customised to your liking.
Ingredients You’ll Need
- For the Chicken Katsu:
- 4 skinless, boneless chicken breasts (about 150g each)
- 75g plain flour
- 2 large eggs, beaten
- 150g Panko breadcrumbs
- Vegetable or sunflower oil, for frying (about 700ml)
- Salt and freshly ground black pepper
- For the Tonkatsu Sauce:
- 120ml tomato ketchup
- 60ml Worcestershire sauce
- 2 tbsp soy sauce
- 1 tbsp mirin (Japanese sweet rice wine)
- 1 tbsp brown sugar
- 1 tsp grated ginger (optional)
- For Assembling the Bowls:
- 300g Japanese short-grain or sushi rice
- ¼ head of white cabbage, very finely shredded
- 2 spring onions, thinly sliced
- Toasted sesame seeds, for garnish
Tip: Don’t substitute Panko with regular breadcrumbs. Panko flakes are larger and lighter, which is the secret to the signature crispy, non-greasy texture of a proper katsu. You can find them in the world food aisle of most large supermarkets.
How to Make Japanese Katsu Bowls Recipe
- Cook the Rice: First, get the rice on. Rinse the 300g of Japanese short-grain rice under cold water until the water runs clear. Cook it according to the packet instructions, whether in a rice cooker or on the hob. Once cooked, let it stand, covered, to keep warm.
- Prepare the Chicken: Place a chicken breast between two pieces of cling film or baking parchment. Using a meat mallet or a rolling pin, carefully pound the chicken to an even thickness of about 1.5cm (just over half an inch). This ensures it cooks evenly. Season both sides generously with salt and pepper. Repeat with the remaining chicken breasts.
- Set Up Your Breading Station: You’ll need three shallow dishes. In the first, place the 75g of plain flour. In the second, whisk the 2 large eggs. In the third, spread out the 150g of Panko breadcrumbs. This organised setup makes the next step much smoother.
- Coat the Chicken: Take one piece of seasoned chicken and dredge it thoroughly in the flour, shaking off any excess. Next, dip it into the beaten egg, letting the excess drip off. Finally, press it firmly into the Panko breadcrumbs, ensuring it’s completely and generously coated on all sides. Set the coated chicken on a wire rack. Repeat for all pieces.
- Mix the Tonkatsu Sauce: While the oil heats up, you can quickly make the sauce. In a small bowl, simply whisk together the ketchup, Worcestershire sauce, soy sauce, mirin, brown sugar, and grated ginger (if using) until smooth. Set it aside.
- Fry the Chicken Katsu: Pour the oil into a large, heavy-bottomed pan or wok until it’s about 3cm deep. Heat the oil over a medium-high heat to 170°C. If you don’t have a thermometer, you can test it by dropping a Panko crumb in; it should sizzle vigorously and turn golden in about 30-45 seconds. Carefully place one or two pieces of chicken in the hot oil.
- Cook and Rest: Fry for 3-4 minutes on each side, until deep golden brown and cooked through. Avoid turning it too often. Once cooked, remove the chicken from the oil and place it on a wire rack to drain. This keeps the underside from getting soggy. Let the chicken rest for at least 5 minutes. My kids absolutely devour this every time I make it, and that resting time is key to a juicy result.
- Assemble Your Katsu Bowls: Slice the rested chicken katsu into 2cm strips. To assemble the bowls, spoon a generous portion of the warm rice into each bowl. Top with a handful of finely shredded cabbage, then arrange the sliced chicken katsu on top. Drizzle generously with your homemade tonkatsu sauce, and finish with a sprinkle of sliced spring onions and toasted sesame seeds.
Tips From My Kitchen
- Double Dredge for Extra Crunch: For an even thicker, crunchier crust, you can repeat the coating process. After the first Panko coating, dip the chicken back into the egg and then into the Panko again.
- Keep it Crispy: Always rest your fried katsu on a wire rack, never on a plate or paper towels. A wire rack allows air to circulate, preventing the bottom from steaming and becoming soft.
- Shred Cabbage Like a Pro: For that feather-light, wispy shredded cabbage, use a mandoline slicer if you have one (using the safety guard, of course!). If not, use your sharpest knife to slice it as thinly as you possibly can.
- Make Extra Sauce: The tonkatsu sauce is delicious on so many things. I always make a double batch. It keeps in an airtight container in the fridge for a couple of weeks and is great with sausages or as a dipping sauce.
Common Mistakes to Avoid
- Overcrowding the pan: It’s tempting to fry all the chicken at once, but this is a mistake. Adding too much chicken to the pan will cause the oil temperature to drop significantly. This results in the chicken absorbing more oil, leading to a greasy, pale, and soggy crust instead of a crispy, golden one. Always fry in batches of one or two pieces at a time.
- Wrong temperature: Frying is a science, and temperature is critical. The ideal range for katsu is between 170°C and 180°C. If the oil is too hot, the Panko will burn before the chicken is cooked through. If it’s too cool, the chicken will soak up oil and become heavy. Using a cooking thermometer is the most reliable way to maintain the correct temperature.
- Skipping the rest time: After frying, the muscle fibres in the chicken are tense. Slicing it immediately will cause all the delicious juices to run out onto your cutting board. Allowing the katsu to rest for at least 5 minutes lets the fibres relax and reabsorb those juices, ensuring every bite is moist and flavourful.
What to Serve With Japanese Katsu Bowls Recipe
While this bowl is a complete meal in itself, a few small additions can elevate it further:
- A simple Miso Soup served on the side.
- Pickled ginger (gari) to cleanse the palate between bites.
- A small dish of Japanese pickles, such as takuan (pickled daikon).
- Steamed or blanched edamame beans.
Frequently Asked Questions
Japanese Katsu Bowls
Ingredients
Method
- Cook the Rice: First, get the rice on. Rinse the 300g of Japanese short-grain rice under cold water until the water runs clear. Cook it according to the packet instructions, whether in a rice cooker or on the hob. Once cooked, let it stand, covered, to keep warm.
- Prepare the Chicken: Place a chicken breast between two pieces of cling film or baking parchment. Using a meat mallet or a rolling pin, carefully pound the chicken to an even thickness of about 1.5cm (just over half an inch). This ensures it cooks evenly. Season both sides generously with salt and pepper. Repeat with the remaining chicken breasts.
- Set Up Your Breading Station: You'll need three shallow dishes. In the first, place the 75g of plain flour. In the second, whisk the 2 large eggs. In the third, spread out the 150g of Panko breadcrumbs. This organised setup makes the next step much smoother.
- Coat the Chicken: Take one piece of seasoned chicken and dredge it thoroughly in the flour, shaking off any excess. Next, dip it into the beaten egg, letting the excess drip off. Finally, press it firmly into the Panko breadcrumbs, ensuring it's completely and generously coated on all sides. Set the coated chicken on a wire rack. Repeat for all pieces.
- Mix the Tonkatsu Sauce: While the oil heats up, you can quickly make the sauce. In a small bowl, simply whisk together the ketchup, Worcestershire sauce, soy sauce, mirin, brown sugar, and grated ginger (if using) until smooth. Set it aside.
- Fry the Chicken Katsu: Pour the oil into a large, heavy-bottomed pan or wok until it's about 3cm deep. Heat the oil over a medium-high heat to 170°C. If you don't have a thermometer, you can test it by dropping a Panko crumb in; it should sizzle vigorously and turn golden in about 30-45 seconds. Carefully place one or two pieces of chicken in the hot oil.
- Cook and Rest: Fry for 3-4 minutes on each side, until deep golden brown and cooked through. Avoid turning it too often. Once cooked, remove the chicken from the oil and place it on a wire rack to drain. This keeps the underside from getting soggy. Let the chicken rest for at least 5 minutes. My kids absolutely devour this every time I make it, and that resting time is key to a juicy result.
- Assemble Your Katsu Bowls: Slice the rested chicken katsu into 2cm strips. To assemble the bowls, spoon a generous portion of the warm rice into each bowl. Top with a handful of finely shredded cabbage, then arrange the sliced chicken katsu on top. Drizzle generously with your homemade tonkatsu sauce, and finish with a sprinkle of sliced spring onions and toasted sesame seeds.
Notes
I really hope you give this Japanese Katsu Bowls recipe a go. It’s one of those deeply rewarding dishes to make from scratch, and the results are always worth the little bit of effort. If you’re looking for other satisfying meals, you might also enjoy my family’s take on Crack Chicken Penne Recipe. Please let me know how your katsu bowls turn out in the comments below – I love hearing from you!