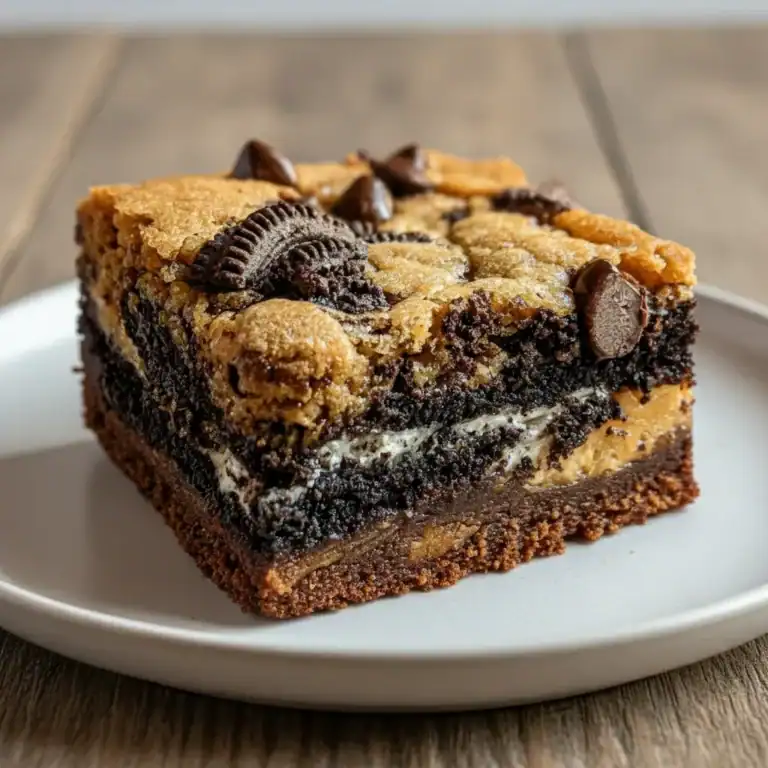
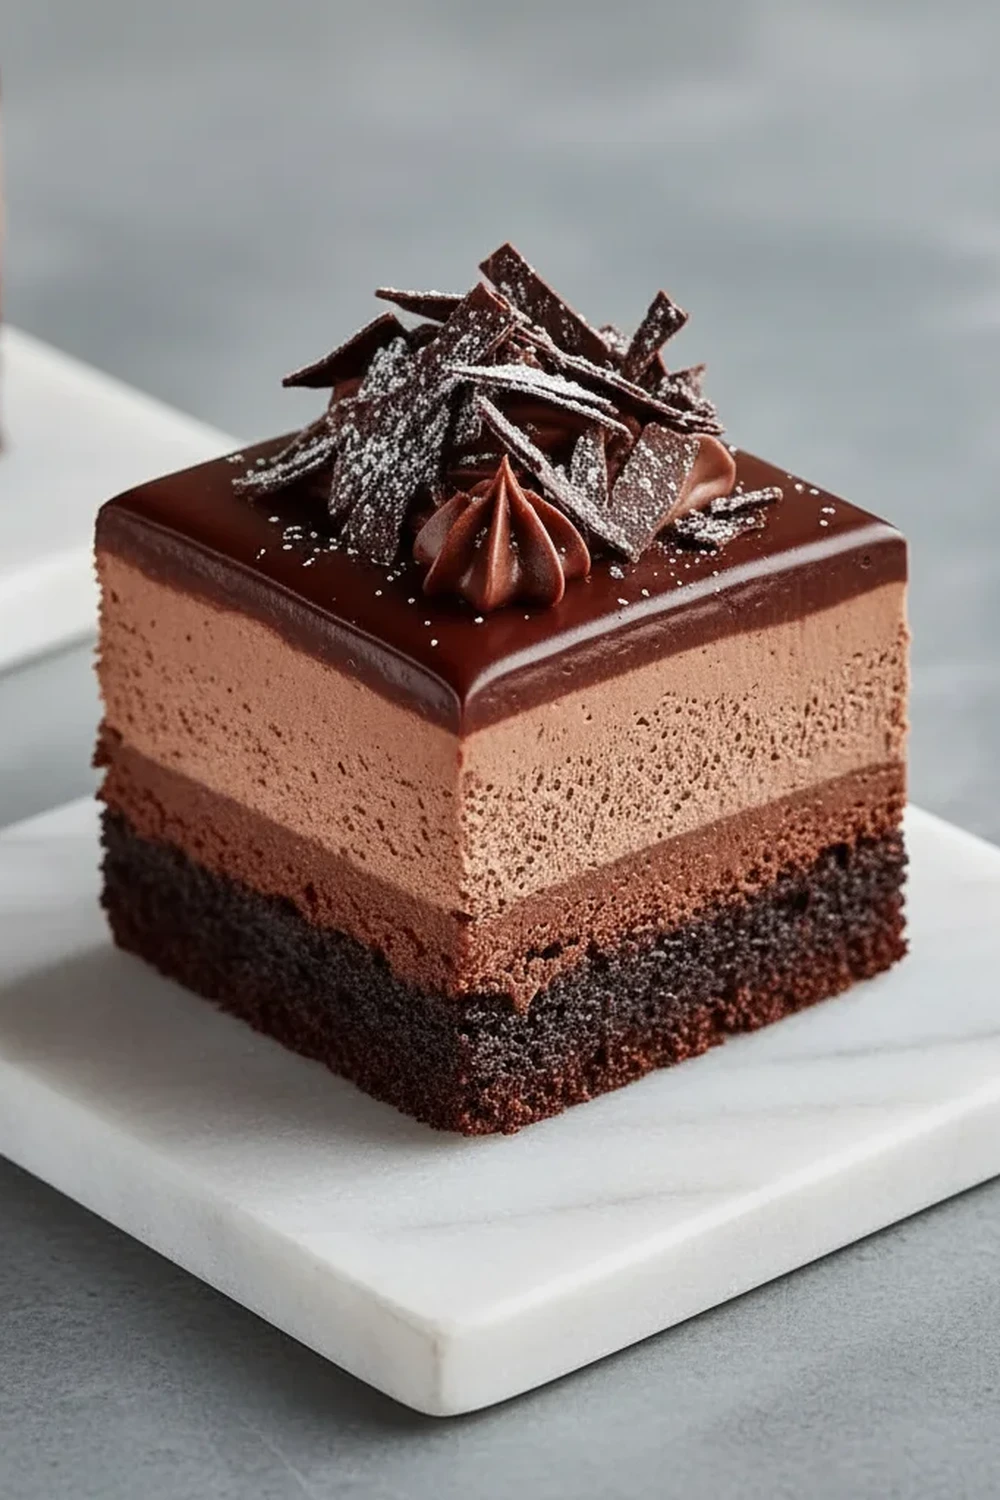
Fudgy Chocolate Mousse Brownies
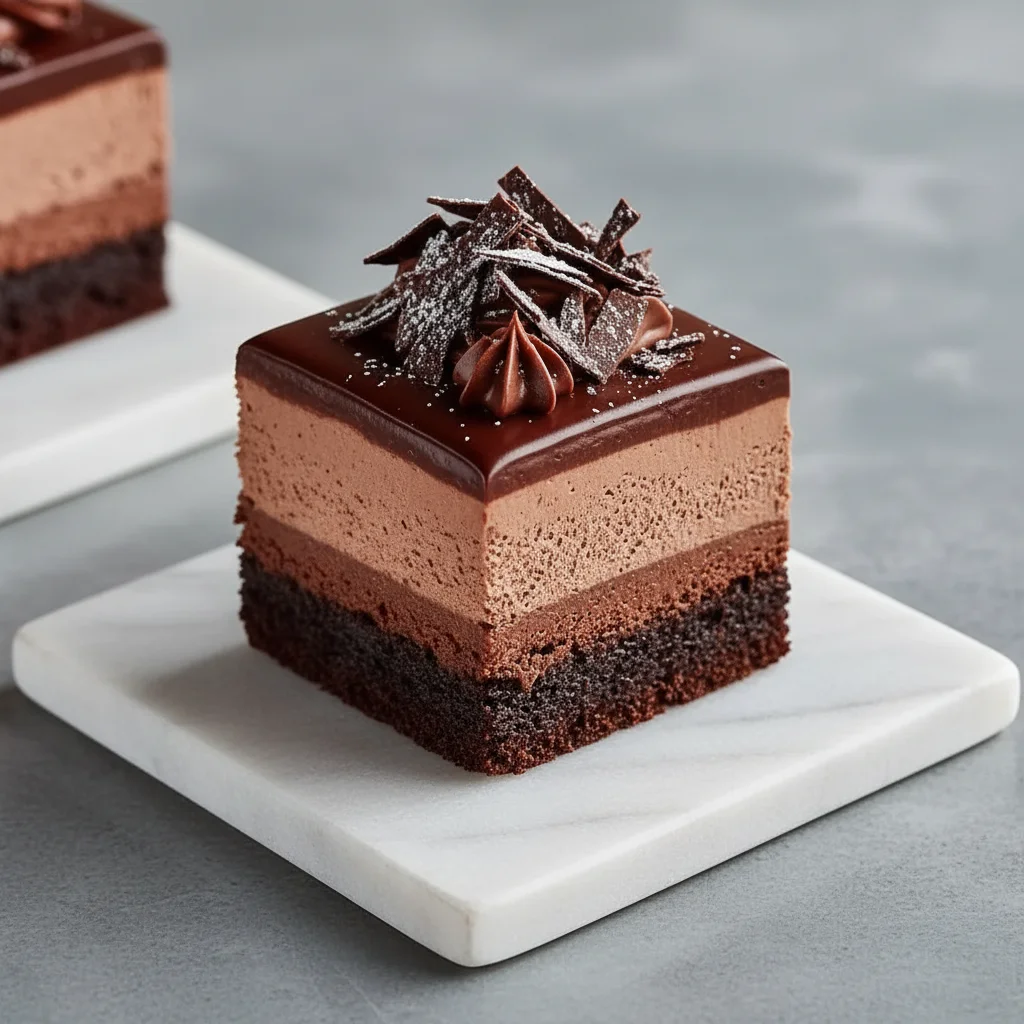
There are chocolate brownies, and then there are Chocolate Mousse Brownies. This isn’t just a simple traybake; it’s a three-tiered marvel of chocolatey goodness that we absolutely adore in my house. It begins with a deeply fudgy, dense brownie base, which is then topped with a cloud-like, ethereal chocolate mousse, and finally crowned with a glossy, rich chocolate ganache. Each layer offers a completely different texture and taste, but together they create something truly special. This was inspired by a dessert I had at a little restaurant in Spain, where they layered different chocolate textures into one spectacular dish, and I knew I had to recreate that magic at home.
The journey from a simple baked brownie to this layered creation is incredibly rewarding. The base is rich and satisfying, the way a proper chocolate brownie should be. Then comes the mousse – light, airy, and intensely chocolatey, it melts in your mouth. The final layer of smooth ganache brings it all together with a final, decadent flourish. This is the kind of dessert that gets audible “wows” when you bring it to the table.
It’s an ideal bake for when you want to make something a little more impressive for a special occasion, like a birthday or a dinner party with friends. It always gets compliments, and while it looks complicated with its distinct layers, the process is quite straightforward if you follow the steps. If you’re a true chocolate aficionado, this is the ultimate treat for you.
Recipe Overview
This recipe guides you through creating three distinct chocolate layers that combine to form one unforgettable dessert. We start by baking a rich, fudgy brownie base. Once cooled, we’ll whip up a delicate and airy chocolate mousse to spread on top. The final step is a simple but luxurious ganache that provides a smooth, glossy finish. I’ve found that the chilling time is non-negotiable; it’s what allows the mousse to set perfectly and makes slicing a breeze.
- Prep Time: 45 minutes
- Cook Time: 25 minutes
- Chilling Time: 4 hours
- Total Time: 5 hours 10 minutes
- Servings: 16 squares
- Difficulty: Medium
Why You’ll Love These Chocolate Mousse Brownies
- Three Textures in One: You get the satisfyingly dense chew of a fudgy brownie, the silky, melt-in-your-mouth lightness of the mousse, and the smooth, rich snap of the ganache topping. It’s a truly multi-layered experience.
- Intense Chocolate Flavour: We use good-quality dark chocolate in all three layers, building a deep, complex cocoa flavour that isn’t overly sweet. It tastes genuinely luxurious.
- A Show-Stopping Dessert: The clean, distinct layers make this look like it came from a fancy patisserie. It’s a fantastic centrepiece dessert for dinner parties or celebrations.
- Make-Ahead Friendly: This dessert needs to chill, which works beautifully for planning ahead. You can make it the day before your event, and it will be perfectly set and ready to serve.
- Family Tested: My family requests these instead of a birthday cake now. The combination of textures is something everyone seems to love, and the tray is always empty by the end of the night.
Ingredients You’ll Need
For a recipe this focused on chocolate, the quality of your ingredients really shines through. I always use a 70% cocoa dark chocolate, like Green & Black’s, for the brownie and mousse as it provides a robust flavour that balances the sweetness. For the ganache, a 50-60% cocoa chocolate works well for a glossier finish.
- For the Brownie Base:
- 150g unsalted butter, cubed
- 150g dark chocolate (70% cocoa), roughly chopped
- 250g caster sugar
- 3 large free-range eggs, at room temperature
- 1 tsp vanilla extract
- 90g plain flour
- 30g unsweetened cocoa powder
- ½ tsp salt
- For the Chocolate Mousse:
- 150g dark chocolate (70% cocoa), finely chopped
- 300ml double cream, cold
- 2 large free-range egg whites
- 50g caster sugar
- For the Ganache Topping:
- 100g dark chocolate (50-60% cocoa), finely chopped
- 120ml double cream
Sophia’s Tip: Ensure your eggs are at room temperature for the brownie base. They’ll incorporate much more smoothly into the batter and trap more air, resulting in a perfectly fudgy, not cakey, texture.
How to Make Chocolate Mousse Brownies
We’ll tackle this recipe in three stages: baking the base, preparing the mousse, and finishing with the ganache. The most important part is allowing each layer to cool or set properly before adding the next. Patience is key to achieving those beautiful, clean layers!
- Prepare the Brownie Base: Preheat your oven to 180°C (160°C fan) and grease and line a 20cm (8-inch) square baking tin with baking parchment, leaving some overhang to help you lift it out later.
- Melt Chocolate and Butter: In a heatproof bowl set over a saucepan of gently simmering water (a bain-marie), melt the 150g of dark chocolate and the butter together, stirring until smooth. Remove from the heat and set aside to cool slightly for about 5 minutes.
- Make the Batter: In a large bowl, whisk the caster sugar and eggs together for 2-3 minutes until pale and slightly fluffy. Stir in the vanilla extract and the cooled chocolate-butter mixture until just combined. Sift the plain flour, cocoa powder, and salt over the wet ingredients and gently fold everything together until you can’t see any streaks of flour. Be careful not to overmix.
- Bake the Brownie: Pour the batter into your prepared tin and smooth the top. Bake for 22-25 minutes. The edges should be set and the centre should have a slight wobble when you gently shake the tin. A skewer inserted into the centre should come out with moist crumbs attached. Let the brownie cool completely in the tin – this is crucial!
- Make the Mousse: While the brownie cools, prepare the mousse. Melt the 150g of dark chocolate in a bain-marie or in short bursts in the microwave, then set aside to cool to room temperature. In a separate bowl, whip the 300ml of cold double cream until it holds soft peaks. In another clean bowl, whisk the egg whites until foamy, then gradually add the 50g of caster sugar, whisking continuously until you have stiff, glossy peaks.
- Combine the Mousse: Gently fold the cooled melted chocolate into the whipped cream until just combined. Then, add a third of the egg white mixture to lighten the chocolate base before gently folding in the remaining egg whites. I find using a large metal spoon to fold helps keep the maximum amount of air in the mousse.
- Assemble and Chill: Once the brownie is completely cool, spread the chocolate mousse evenly over the top. Place the tin in the refrigerator and chill for at least 4 hours, or until the mousse is firm to the touch.
- Prepare the Ganache: Place the 100g of finely chopped chocolate in a heatproof bowl. Heat the 120ml of double cream in a small saucepan until it just begins to simmer. Pour the hot cream over the chocolate and let it sit for 5 minutes without stirring. Then, stir gently from the centre outwards until you have a smooth, glossy ganache.
- Finish and Chill Again: Let the ganache cool for about 10-15 minutes, then pour it over the set mousse layer, gently tilting the tin to cover the surface completely. Return it to the fridge for at least 1 hour, or until the ganache is set. To serve, lift the brownie out of the tin using the parchment paper and slice into squares with a sharp knife.
Tips From My Kitchen
- Temperature Control is Everything: The brownie base must be completely cool before you add the mousse layer. I can’t stress this enough! A warm base will melt the mousse, and you’ll lose that beautiful layered effect and end up with a chocolatey mess.
- The Secret to Airy Mousse: When making the mousse, the key is gentle folding. I learned that using an ‘under and over’ motion with a large spatula, rather than stirring, is crucial to keeping the mixture light. You can find excellent visual guides for this folding technique online if you’re unsure.
- Make-Ahead Master: The brownie base can be baked a day in advance. Let it cool completely, then cover it tightly in the tin at room temperature. You can then add the mousse and ganache layers the next day, making it perfect for spreading out the workload.
- Perfect Slicing: For those super clean, professional-looking slices, fill a jug with hot water. Dip a long, sharp knife into the water, wipe it dry, and make a cut. Repeat this process for every single cut. It’s a little extra effort that makes a huge difference. If you like sweet treats, you might also enjoy my recipe for Biscoff Truffles.
What to Serve With Chocolate Mousse Brownies
These brownies are incredibly rich and decadent on their own, but a simple accompaniment can elevate them even further. Here are a few of my favourite pairings:
- Fresh Raspberries: The tartness of fresh raspberries provides a wonderful contrast to the deep chocolate flavour and cuts through the richness beautifully.
- Crème Fraîche: A simple dollop of crème fraîche offers a tangy counterpoint that balances the sweetness of the dessert without adding more richness, unlike whipped cream.
- A Strong Coffee: For the adults, a hot, strong espresso or a black Americano is the perfect beverage. The bitter notes of the coffee complement the chocolate wonderfully.
Frequently Asked Questions
Chocolate Mousse Brownies
Ingredients
Method
- Prepare the Brownie Base: Preheat your oven to 180°C (160°C fan) and grease and line a 20cm (8-inch) square baking tin with baking parchment, leaving some overhang to help you lift it out later.
- Melt Chocolate and Butter: In a heatproof bowl set over a saucepan of gently simmering water (a bain-marie), melt the 150g of dark chocolate and the butter together, stirring until smooth. Remove from the heat and set aside to cool slightly for about 5 minutes.
- Make the Batter: In a large bowl, whisk the caster sugar and eggs together for 2-3 minutes until pale and slightly fluffy. Stir in the vanilla extract and the cooled chocolate-butter mixture until just combined. Sift the plain flour, cocoa powder, and salt over the wet ingredients and gently fold everything together until you can't see any streaks of flour. Be careful not to overmix.
- Bake the Brownie: Pour the batter into your prepared tin and smooth the top. Bake for 22-25 minutes. The edges should be set and the centre should have a slight wobble when you gently shake the tin. A skewer inserted into the centre should come out with moist crumbs attached. Let the brownie cool completely in the tin – this is crucial!
- Make the Mousse: While the brownie cools, prepare the mousse. Melt the 150g of dark chocolate in a bain-marie or in short bursts in the microwave, then set aside to cool to room temperature. In a separate bowl, whip the 300ml of cold double cream until it holds soft peaks. In another clean bowl, whisk the egg whites until foamy, then gradually add the 50g of caster sugar, whisking continuously until you have stiff, glossy peaks.
- Combine the Mousse: Gently fold the cooled melted chocolate into the whipped cream until just combined. Then, add a third of the egg white mixture to lighten the chocolate base before gently folding in the remaining egg whites. I find using a large metal spoon to fold helps keep the maximum amount of air in the mousse.
- Assemble and Chill: Once the brownie is completely cool, spread the chocolate mousse evenly over the top. Place the tin in the refrigerator and chill for at least 4 hours, or until the mousse is firm to the touch.
- Prepare the Ganache: Place the 100g of finely chopped chocolate in a heatproof bowl. Heat the 120ml of double cream in a small saucepan until it just begins to simmer. Pour the hot cream over the chocolate and let it sit for 5 minutes without stirring. Then, stir gently from the centre outwards until you have a smooth, glossy ganache.
- Finish and Chill Again: Let the ganache cool for about 10-15 minutes, then pour it over the set mousse layer, gently tilting the tin to cover the surface completely. Return it to the fridge for at least 1 hour, or until the ganache is set. To serve, lift the brownie out of the tin using the parchment paper and slice into squares with a sharp knife.
Notes
I really hope you give these Chocolate Mousse Brownies a try. They are a true labour of love, but the final result is so worth the effort. There’s nothing quite like seeing those perfect layers when you slice into it for the first time. Let me know how you get on in the comments below – I’d love to hear about your baking adventures!
From my kitchen to yours,
Sophia