Classic Chewy Sugar Cookies
There is something uniquely comforting about a classic sugar cookie. It’s a bake that doesn’t shout for attention with mountains of chocolate or exotic ingredients; instead, it offers a quiet, satisfying sweetness that takes you right back to childhood. For years, I searched for the definitive recipe—one that produced baked cookies with chewy centres, slightly crisp edges, and a rich vanilla flavour that could stand on its own without a swirl of icing. This is that recipe. It’s the one I turn to for lazy Sunday afternoons, school bake sales, and holiday decorating sessions.
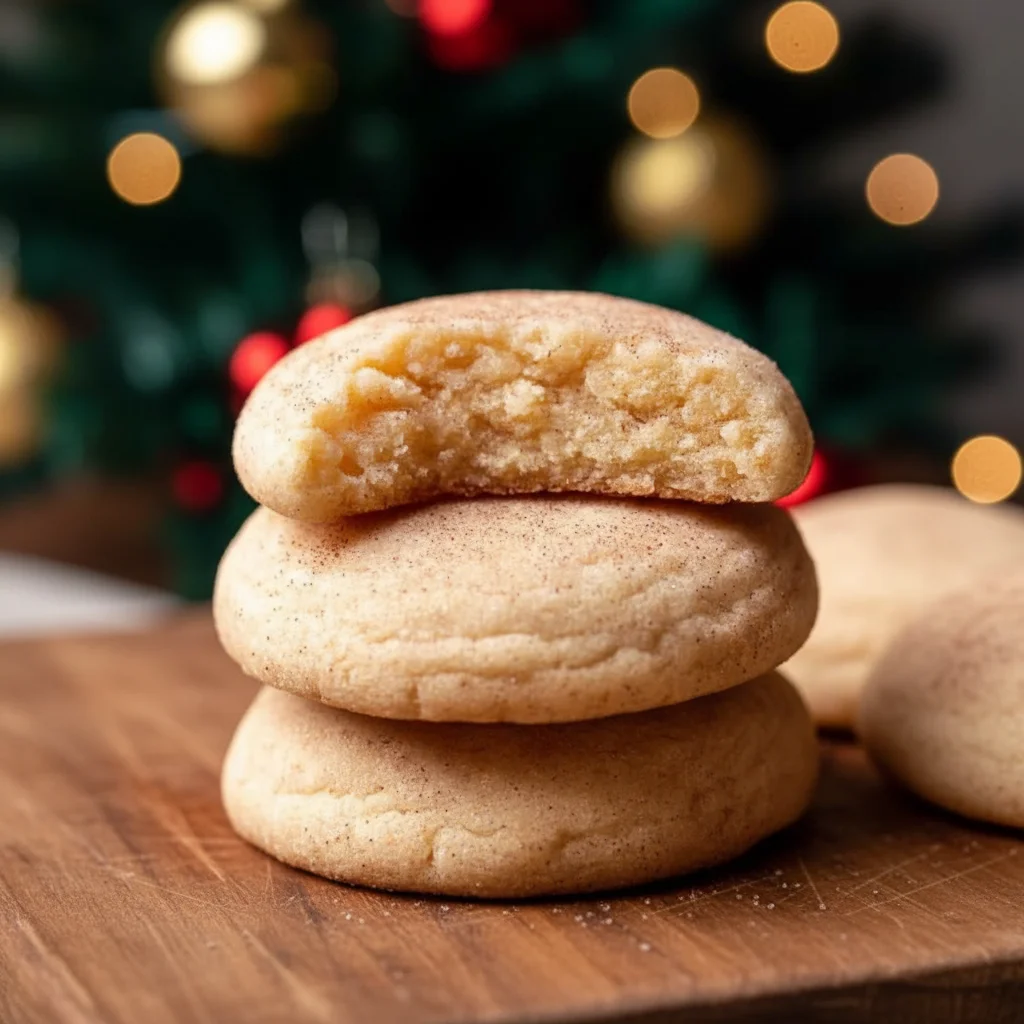
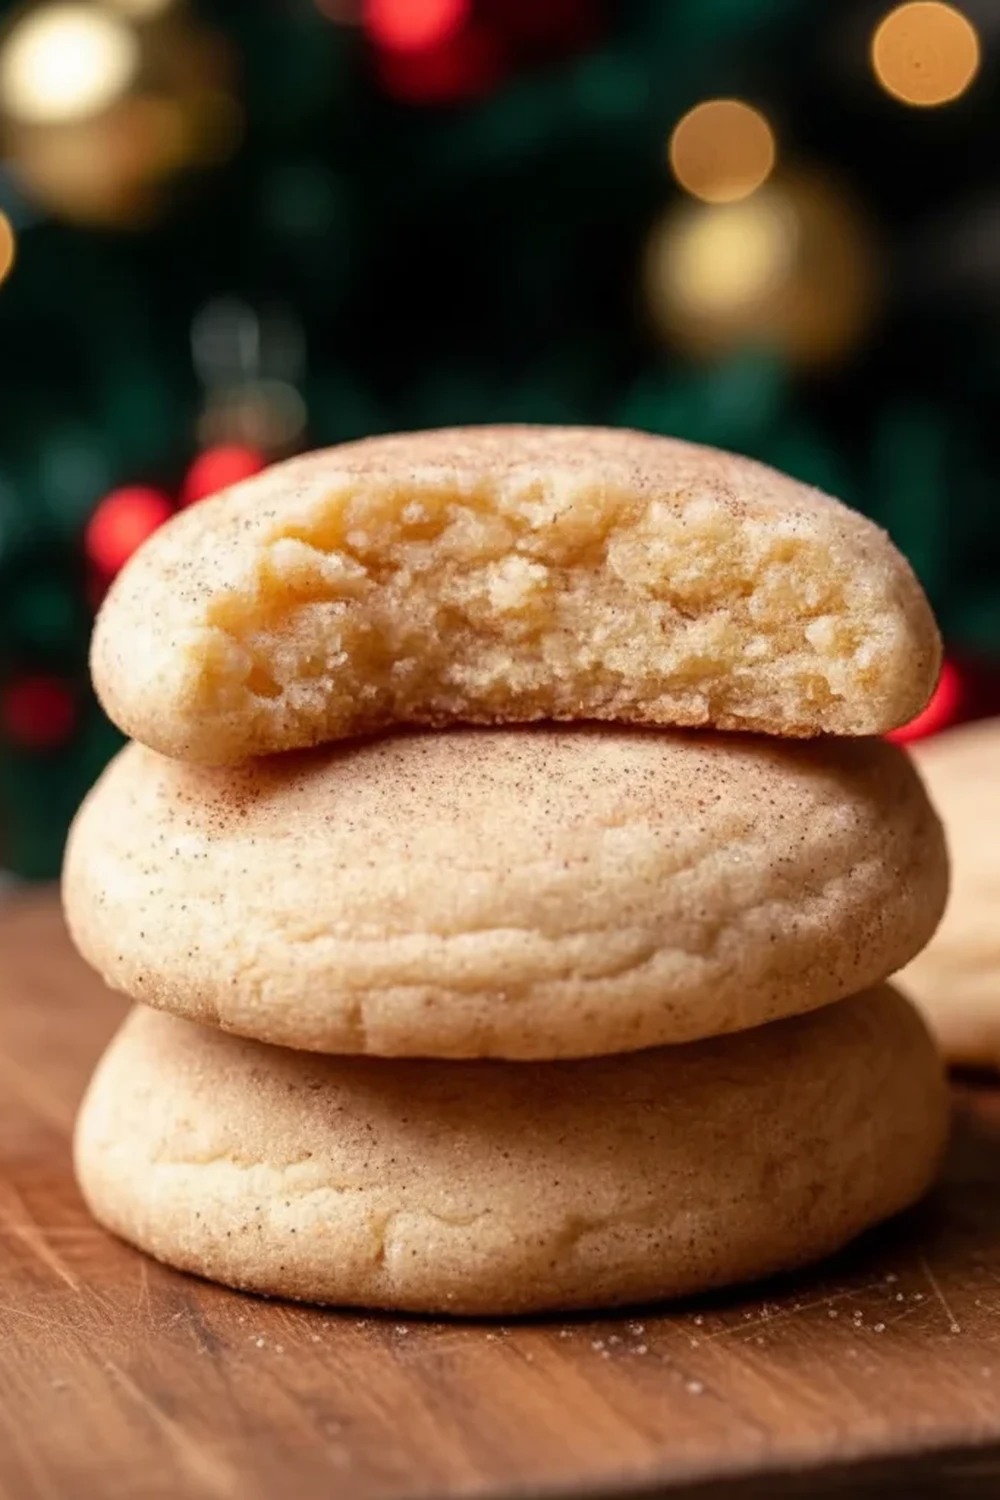
What makes these sugar cookies so special is their texture. They are wonderfully soft and thick, with a satisfying density that feels substantial, not airy or cakey. The secret lies in a couple of small adjustments to the classic formula, which we’ll get into below. The dough comes together beautifully, and the final cookies have a lovely crinkled top from being rolled in sugar before baking, which gives them a little sparkle. My kids absolutely devour these every time I make them, often grabbing them warm from the cooling rack before I’ve even had a chance to put them away.
This recipe is ideal when you want a straightforward bake that delivers consistently brilliant results. It’s a fantastic starting point for new bakers, yet it’s the one experienced bakers will return to again and again. Whether you enjoy them plain with a cup of tea or use them as a canvas for decorating, these chewy sugar cookies are sure to become a staple in your kitchen. If you’re a fan of classic bakes, you might also love my Oatmeal Dark Chocolate Cookies.
Recipe Overview
This recipe yields wonderfully thick and chewy sugar cookies with a rich, buttery vanilla flavour and a slightly crisp, sugary exterior. They hold their shape well without spreading too much, resulting in a beautifully soft and satisfying bake. I stumbled upon the combination of cornflour and an extra egg yolk by accident while experimenting, and it’s been the key to achieving that perfect chewy texture ever since.
- Prep Time: 15 minutes
- Chill Time: 1 hour
- Cook Time: 10-12 minutes
- Total Time: 1 hour 27 minutes
- Servings: 24 cookies
- Difficulty: Easy
Why You’ll Love These Sugar Cookies
- Unforgettable Chewy Texture: The combination of an extra egg yolk and a touch of cornflour creates a gloriously soft, dense centre that stays chewy for days after baking.
- Comes Together in Under 30 Minutes (plus chilling): The hands-on time for making the dough is very minimal, making this a straightforward and rewarding baking project.
- A Wonderful Base for Creativity: While delicious on their own, these classic cookies are a brilliant canvas for simple icing, colourful sprinkles, or a drizzle of melted chocolate.
- Works Beautifully for Any Occasion: From filling the biscuit tin for the week to making a big batch for a birthday party or holiday gathering, they always fit the bill.
- Family Tested and Approved: This is one of the most requested bakes in my house. Everyone seems to love the simple, pure flavour of a truly well-made sugar cookie.
Ingredients You’ll Need
We’re using simple, high-quality pantry staples here. The flavour of these cookies is quite pure, so using good ingredients really makes a difference. I always opt for a quality vanilla bean paste or extract, like Nielsen-Massey, as its flavour is the star of the show.
- 225g unsalted butter, at room temperature
- 300g caster sugar, plus extra for rolling
- 1 large free-range egg, at room temperature
- 1 large free-range egg yolk, at room temperature
- 2 tsp vanilla extract or vanilla bean paste
- 375g plain flour
- 2 tbsp cornflour
- 1 tsp baking powder
- ½ tsp salt
Sophia’s Tip: Ensure your eggs and butter are truly at room temperature. This helps them emulsify properly with the sugar, creating a smooth, uniform dough and preventing the mixture from splitting.
How to Make Sugar Cookies
The process is straightforward, following the classic creaming method. The most crucial part for achieving that perfect chewy texture is to avoid overmixing the flour and to give the dough a proper rest in the fridge before baking.
- In a large bowl or the bowl of a stand mixer fitted with the paddle attachment, beat the room-temperature butter and caster sugar together on medium speed for about 3-4 minutes, until the mixture is light, pale, and fluffy. Scrape down the sides of the bowl as needed.
- Add the whole egg, egg yolk, and vanilla extract. Beat again on medium speed for another minute until everything is well combined and the mixture is smooth.
- In a separate medium bowl, whisk together the plain flour, cornflour, baking powder, and salt. This ensures the leavening agents are evenly distributed.
- With the mixer on its lowest speed, gradually add the dry ingredients to the wet ingredients in three additions. Mix only until the last streaks of flour have just disappeared. I find it’s best to stop the mixer early and finish folding with a spatula to avoid overworking the gluten, which can make the cookies tough.
- Cover the bowl with cling film and chill the dough in the refrigerator for at least 1 hour, or up to 3 days. This step is essential for preventing the cookies from spreading too much in the oven.
- When you’re ready to bake, preheat your oven to 180°C (160°C Fan) and line two large baking trays with parchment paper.
- Pour some extra caster sugar into a small, shallow bowl. Scoop the chilled dough and roll it into balls about 1.5 inches in diameter. Roll each ball in the caster sugar to coat it completely.
- Place the sugar-coated balls onto the prepared baking trays, leaving about 5-6cm of space between each one to allow for some spreading. Gently press down on the top of each ball with the palm of your hand or the bottom of a glass to flatten it slightly.
- Bake for 10-12 minutes, or until the edges are a very light golden brown and the centres look set but still soft. They might appear slightly underbaked in the middle, but they will continue to cook on the hot tray.
- Let the baked cookies cool on the baking tray for 5 minutes before carefully transferring them to a wire rack to cool completely.
Tips From My Kitchen
- Temperature is Everything: Chilled dough is the secret to thick, chewy sugar cookies. If your kitchen is particularly warm, I recommend placing the tray of rolled dough balls back in the fridge for 10 minutes just before they go into the oven.
- The Double Sugar Secret: The step of rolling the dough balls in sugar before baking is one I learned from an old baking book. It does two things: it adds a lovely, subtle crunch to the exterior and helps create that beautiful crackled surface as the cookies bake.
- Make-Ahead Magic: The cookie dough can be made and stored, well-wrapped, in the fridge for up to 3 days. You can also roll the dough into balls, freeze them on a tray, and then transfer them to a freezer bag for up to 3 months. Bake from frozen, adding an extra 2-3 minutes to the cooking time.
- Proper Storage: Store the cooled cookies in an airtight container at room temperature. They will stay soft and chewy for up to 5 days. Adding a slice of bread to the container can help keep them even softer.
Equipment You’ll Need
- Stand mixer or a hand mixer
- Large baking trays
- Parchment paper
- Wire cooling rack
- Mixing bowls
- Whisk and spatula
Common Mistakes to Avoid
- Overcrowding the Baking Tray: These cookies need space to spread a little. If they are too close together, they will bake into one another and the edges won’t cook properly. Always leave at least 5cm between each dough ball.
- Using Butter That’s Too Warm: If your butter is overly soft or melted, it won’t cream properly with the sugar, leading to a greasy dough that spreads excessively. It should be soft enough to press an indent into, but still hold its shape.
- Skipping the Chilling Time: I can’t stress this enough! Chilling the dough solidifies the butter. As the cookies bake, the cold butter melts more slowly, which means the cookies spread less and maintain their thick, chewy shape. As experts at Serious Eats explain, this step also helps to concentrate the flavour.
Delicious Variations to Try
While these classic cookies are delightful as they are, you can easily adapt the flavour. Here are a few ideas:
- Citrus Zest: Add the finely grated zest of one large lemon or two oranges to the creamed butter and sugar for a bright, fresh flavour.
- Almond Extract: For a flavour reminiscent of Bakewell tart, replace 1 teaspoon of the vanilla extract with ½ teaspoon of almond extract. A little goes a long way!
- Cinnamon Sugar Cookies: Mix 1 teaspoon of ground cinnamon into the caster sugar you use for rolling the dough balls. This adds a lovely warmth. If you enjoy spiced bakes, my Apple Cider Whoopie Pies are another must-try.
What to Serve With Sugar Cookies
These cookies are wonderfully versatile and pair well with many things.
- A Glass of Cold Milk: The ultimate classic pairing that never fails to satisfy.
- Hot Chocolate or Coffee: The simple sweetness of the cookie is a brilliant companion to a rich, warm drink.
– With Fresh Fruit: Serve alongside a bowl of fresh strawberries or raspberries. The slight tartness of the berries provides a lovely contrast.
Frequently Asked Questions
Sugar Cookies
Ingredients
Method
- In a large bowl or the bowl of a stand mixer fitted with the paddle attachment, beat the room-temperature butter and caster sugar together on medium speed for about 3-4 minutes, until the mixture is light, pale, and fluffy. Scrape down the sides of the bowl as needed.
- Add the whole egg, egg yolk, and vanilla extract. Beat again on medium speed for another minute until everything is well combined and the mixture is smooth.
- In a separate medium bowl, whisk together the plain flour, cornflour, baking powder, and salt. This ensures the leavening agents are evenly distributed.
- With the mixer on its lowest speed, gradually add the dry ingredients to the wet ingredients in three additions. Mix only until the last streaks of flour have just disappeared. I find it’s best to stop the mixer early and finish folding with a spatula to avoid overworking the gluten, which can make the cookies tough.
- Cover the bowl with cling film and chill the dough in the refrigerator for at least 1 hour, or up to 3 days. This step is essential for preventing the cookies from spreading too much in the oven.
- When you're ready to bake, preheat your oven to 180°C (160°C Fan) and line two large baking trays with parchment paper.
- Pour some extra caster sugar into a small, shallow bowl. Scoop the chilled dough and roll it into balls about 1.5 inches in diameter. Roll each ball in the caster sugar to coat it completely.
- Place the sugar-coated balls onto the prepared baking trays, leaving about 5-6cm of space between each one to allow for some spreading. Gently press down on the top of each ball with the palm of your hand or the bottom of a glass to flatten it slightly.
- Bake for 10-12 minutes, or until the edges are a very light golden brown and the centres look set but still soft. They might appear slightly underbaked in the middle, but they will continue to cook on the hot tray.
- Let the baked cookies cool on the baking tray for 5 minutes before carefully transferring them to a wire rack to cool completely.
Notes
I truly hope this recipe brings a little sweetness and joy to your kitchen. There’s nothing quite like the smell of these classic cookies baking in the oven. It’s a simple bake that always gets compliments and disappears from the biscuit tin in record time. Let me know how you get on with them in the comments below – I love hearing about your baking adventures!
Happy baking,
Sophia